Run a simple Java sample on B&R APC device running B&R Linux
Table of Contents
- Introduction
- Step 1: Sign Up To Azure IoT Hub
- Step 2: Register Device
- Step 3: Build and Validate the sample using Java client libraries
- Step 4: Troubleshooting
Introduction
About this document
This document provides step by step guidance to run a sample with Azure IoT Java SDK. This multi-step process includes:
- Configuring Azure IoT Hub
- Registering your IoT device
- Build and deploy Azure IoT SDK on device
- Packaging and sharing the logs
Prepare
Before executing any of the steps below, read through each process, step by step to ensure end to end understanding.
You should have the following items ready before beginning the process:
- Computer with GitHub installed and access to the azure-iot-sdk-java GitHub public repository.
- (Optional) SSH client, such as PuTTY, so you can access the command line.
- Required hardware to certify.
Step 1: Sign Up To Azure IoT Hub
Follow the instructions here on how to sign up to the Azure IoT Hub service.
As part of the sign up process, you will receive the connection string.
-
IoT Hub Connection String: An example of IoT Hub Connection String is as below:
HostName=[YourIoTHubName];SharedAccessKeyName=[YourAccessKeyName];SharedAccessKey=[YourAccessKey]
Step 2: Register Device
In this section, you will register your device using DeviceExplorer. The DeviceExplorer is a Windows application that interfaces with Azure IoT Hub and can perform the following operations:
- Device management
- Create new devices
- List existing devices and expose device properties stored on Device Hub
- Provides ability to update device keys
- Provides ability to delete a device
- Monitoring events from your device
- Sending messages to your device
To run DeviceExplorer tool, use following configuration string as described in Step1:
- IoT Hub Connection String
Steps:
-
Click here to download and install DeviceExplorer
-
Add connection information under the Configuration tab and click the Update button.
-
Create and register the device with your IoT Hub using instructions as below.
a. Click the Management tab.
b. Your registered devices will be displayed in the list. In case your device is not there in the list, click Refresh button. If this is your first time, then you shouldn’t retrieve anything.
c. Click Create button to create a device ID and key.
d. Once created successfully, device will be listed in DeviceExplorer.
e. Right click the device and from context menu select “Copy connection string for selected device”.
f. Save this information in Notepad. You will need this information in later steps.
Not running Windows on your PC? - Please follow the instructions here to provision your device and get its credentials.
Step 3: Build and Validate the sample using Java client libraries
This section walks you through building, deploying and validating the IoT Client SDK on your device running a Linux operating system. You will install the necessary prerequisites on your device. Once done, you will build and deploy the IoT Client SDK, and validate the sample tests required for IoT certification with the Azure IoT SDK.
3.1 Install Azure IoT Device SDK and prerequisites on device
-
Open terminal program on the device.
-
Install the prerequisite packages by issuing the following commands from the command line on the device.
3.1.1 Install Java JDK and set up environment variables
-
Choose your commands based on the OS running on your device.
B&R Linux
sudo apt-get update
sudo apt-get install openjdk-8-jdk
Note: If openjdk-8-jdk package is not available, use following steps to add source in sources.list and rerun above commands again.
-
Edit /etc/apt/sources.list
-
Add below line and save the changes.
deb http://ftp.debian.org/debian testing main
Any Other Linux OS
Use equivalent commands on the target OS -
-
Update the PATH environment variable to include the full path to the bin folder containing Java. To ensure the correct path of Java run below command:
which java -
Ensure that the directory shown by the
which javacommand matches one of the directories shown in your $PATH variable. You can confirm this by running following command.echo $PATH -
If Java path is missing in PATH environment variable, run following command to set the same.
export PATH=[PathToJava]/bin:$PATHNOTE: Here [PathToJava] is output of
which javacommand. For example, ifwhich javaoutput is /usr/bin/java, then export command will be export PATH=/usr/bin/java/bin:$PATH -
Make sure that the JAVA_HOME environment variable includes the full path to the JDK. Use below command to get the JDK path.
update-alternatives --config java -
Take note of the JDK location.
update-alternativesoutput will show something similar to /usr/lib/jvm/java-8-openjdk-amd64/jre/bin/java. The JDK directory would then be /usr/lib/jvm/java-8-openjdk-amd64/. -
Run the following command to set JAVA_HOME environment variable.
export JAVA_HOME=[PathToJDK]Note: Here [PathToJDK] is JDK directory. For example if jdk directory is /usr/lib/jvm/java-8-openjdk-amd64/, export command will be export JAVA_HOME=/usr/lib/jvm/java-8-openjdk-amd64/
3.1.2 Install Maven and set up environment variables
-
Choose your commands based on the OS running on your device.
Debian or Ubuntu
sudo apt-get install mavenFedora
sudo dnf install mavenAny Other Linux OS
Use equivalent commands on the target OS -
Update the PATH environment variable to include the full path to the bin folder containing maven. To ensure the correct path of maven, run below command:
which mvn -
Ensure that the directory shown by the
which mvncommand matches one of the directories shown in your $PATH variable. You can confirm this by running following command.echo $PATH -
If maven path is missing in PATH environment variable, run following command to set the same.
export PATH=[PathToMvn]/bin:$PATHNote: Here [PathToMvn] is output of
which mvn. For example ifwhich mvnoutput is /usr/bin/mvn, export command will be export PATH=/usr/bin/mvn/bin:$PATH -
You can verify that the environment variables necessary to run Maven 3 have been set correctly by running
mvn --version.
3.1.3 Install GIT
-
Choose your commands based on the OS running on your device.
Debian or Ubuntu
sudo apt-get install gitFedora
sudo dnf install gitAny Other Linux OS
Use equivalent commands on the target OS
3.1.4 Build the Azure IoT Device SDK for Java
-
Download the SDK to the board by issuing the following command in PuTTY:
git clone https://github.com/Azure/azure-iot-sdk-java.git -
Verify that you now have a copy of the source code under the directory azure-iot-sdk-java.
-
Run the following commands on device in sequence to build Azure IoT SDK.
cd azure-iot-sdk-java/device
mvn install | tee JavaSDK_Build_Logs.txt
Note: We have noticed that certain unit tests can fail when running mvn install as given above with the latest version of JDK 8 (1.8.0_65 at the time this document was written). It works fine with older versions however. If this occurs please skip running unit tests using following command:
cd  azure-iot-sdk-java/device/iot-device-samples
mvn install -DskipTests
3.2 Run and Validate the Samples
In this section you will run the Azure IoT client SDK samples to validate communication between your device and Azure IoT Hub. You will send messages to the Azure IoT Hub service and validate that IoT Hub has successfully receive the data. You will also monitor any messages sent from the Azure IoT Hub to client.
Note: Take screenshots of all the operations you will perform in this section. These will be needed in Step 4.
3.2.1 Send Device Events to IoT Hub:
-
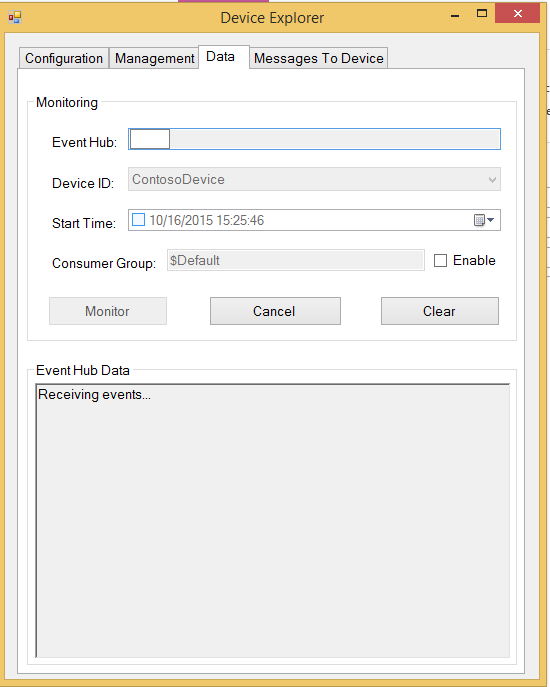
Launch the DeviceExplorer as explained in Step 2 and navigate to Data tab. Select the device name you created from the drop-down list of device IDs and click Monitor button.

-
DeviceExplorer is now monitoring data sent from the selected device to the IoT Hub.
-
Navigate to the folder containing the executable JAR file for send event sample.
cd azure-iot-sdk-java/device/iot-device-samples/send-event/target -
Run the sample by issuing following command.
If using AMQP protocol:
java -jar ./send-event-{version}-with-deps.jar "{connection string}" "{number of requests to send}" "amqps"If using HTTP protocol:
java -jar ./send-event-{version}-with-deps.jar "{connection string}" "{number of requests to send}" "https"If using MQTT protocol:
java -jar ./send-event-{version}-with-deps.jar "{connection string}" "{number of requests to send}" "mqtt"If using Web Sockets with AMQP protocol:
java -jar ./send-event-{version}-with-deps.jar "{connection string}" "{number of requests to send}" "amqps_ws"Replace the following in above command:
{version}: Version of binaries you have build{connection string}: Your device connection string{number of requests to send}: Number of messages you want to send to IoT Hub
-
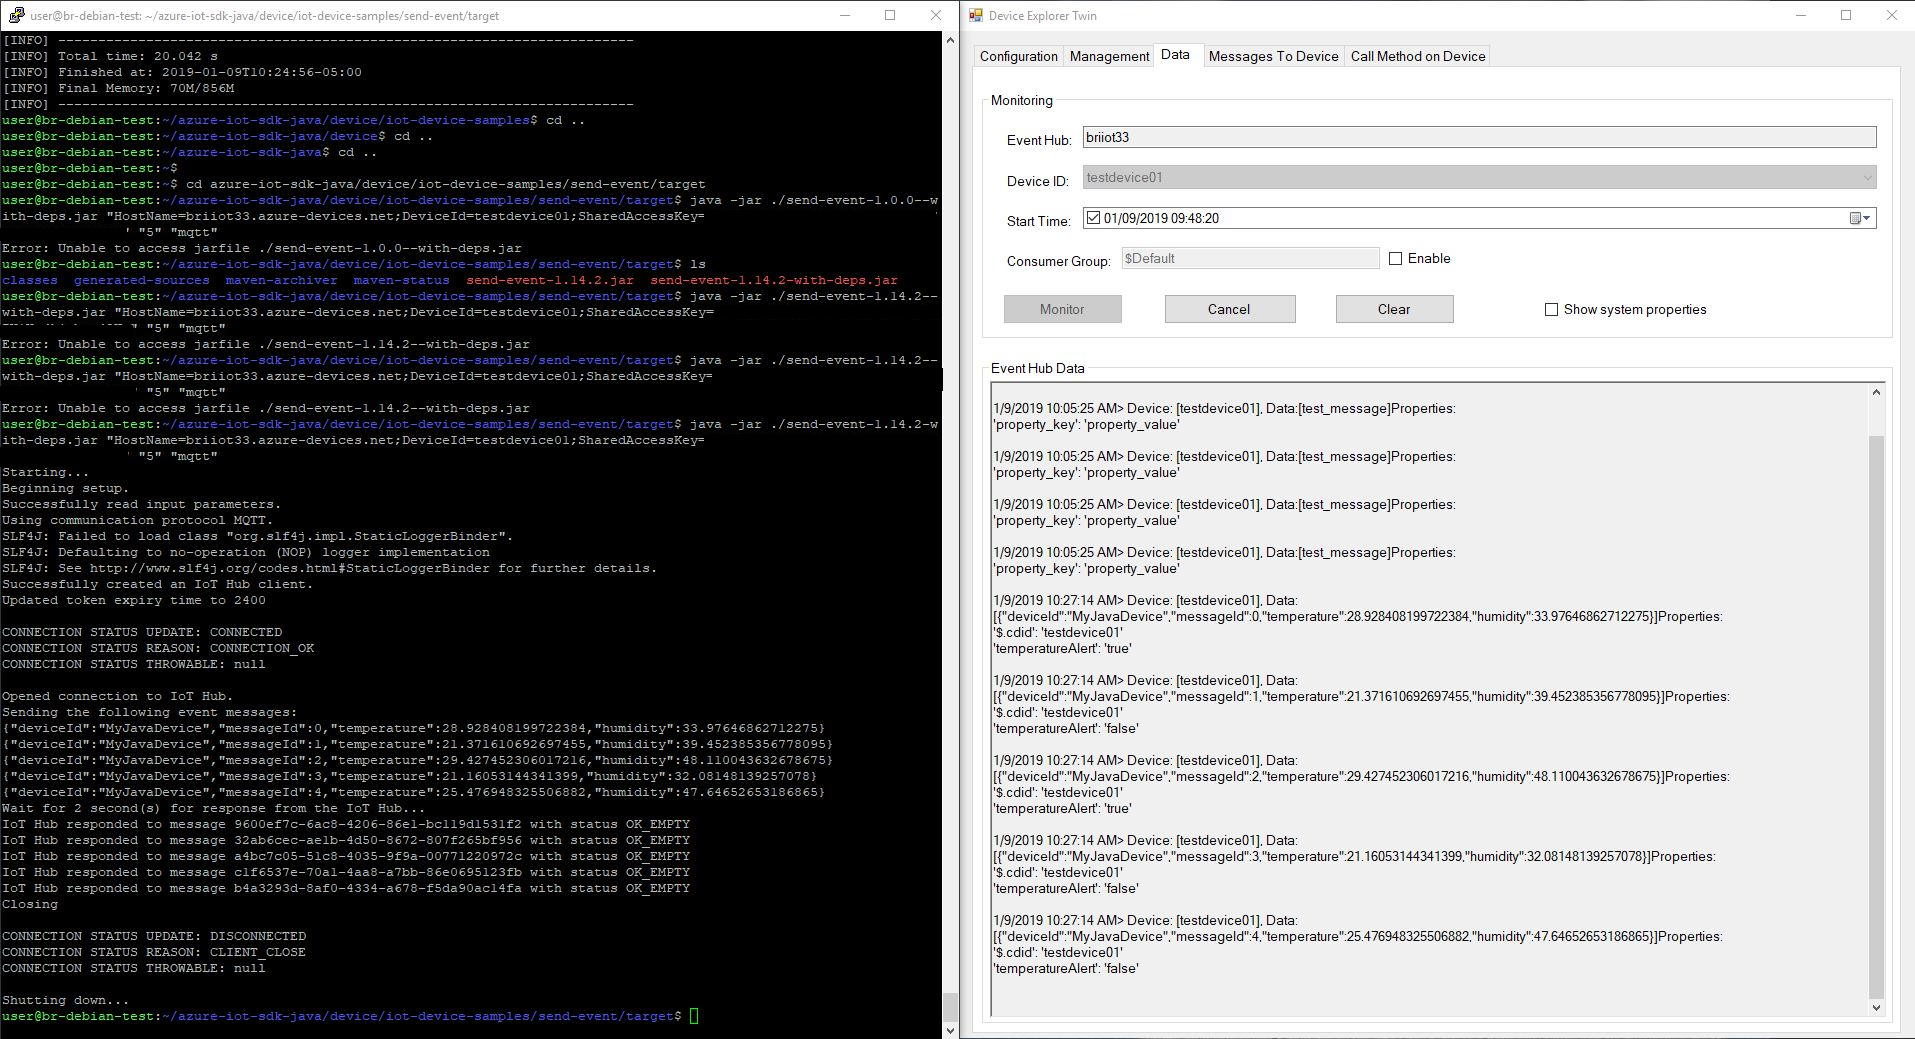
Verify that the confirmation messages show an OK. If not, then you may have incorrectly copied the device hub connection information.
-
DeviceExplorer should show that IoT Hub has successfully received data sent by sample test.
Example - Using MQTT protocol:

3.2.2 Receive messages from IoT Hub
-
To verify that you can send messages from the IoT Hub to your device, go to the Messages To Device tab in DeviceExplorer.
-
Select the device you created using Device ID drop down.
-
Add some text to the Message field, then click Send.
-
Navigate to the folder containing the executable JAR file for the receive message sample.
-
Run the sample by issuing following command.
If using AMQP protocol:
java -jar ./handle-messages-{version}-with-deps.jar "{connection string}" "amqps"If using HTTP protocol:
java -jar ./handle-messages-{version}-with-deps.jar "{connection string}" "https"If using MQTT protocol:
java -jar ./handle-messages-{version}-with-deps.jar "{connection string}" "mqtt"If using Web Sockets with AMQP protocol:
java -jar ./handle-messages-{version}-with-deps.jar "{connection string}" "amqps_ws"Replace the following in above command:
{version}: Version of binaries you have build{connection string}: Your device connection string{number of requests to send}: Number of messages you want to send to IoT Hub
-
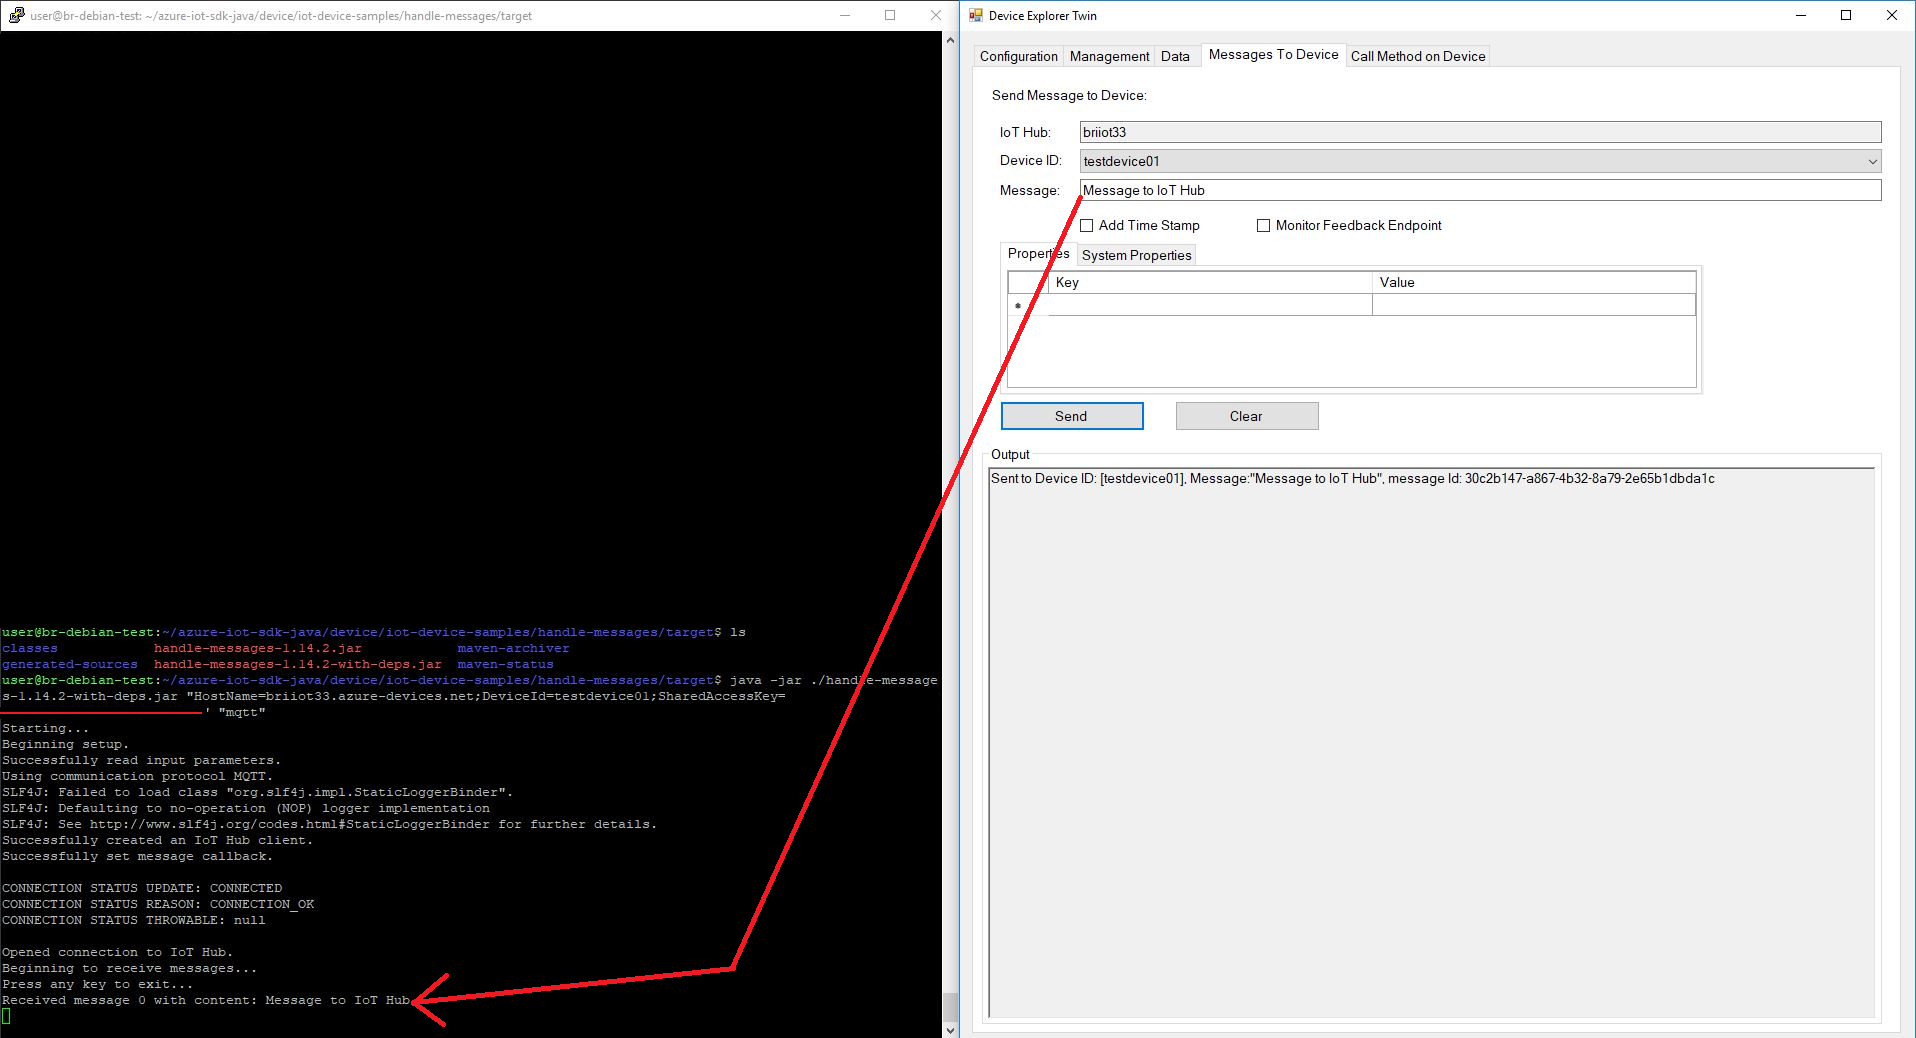
You should be able to see the command received in the console window for the client sample.
Example - Using MQTT protocol:

Step 4: Troubleshooting
Please contact engineering support on support@br-automation.com for help with troubleshooting.
Reference: Some information in this document is obtained from here.